I have a friend thinking of building one like this, so I'm covering it more thoroughly than some might prefer...

I cut the tip to the rough profile that I wanted, used a dremel tool to hog out about a 1/2" of foam, wrapped the tip in tape to enclose it, squeezed it just a bit with the clamps and blocks, and then poured a heavy cream mix of epoxy, graphite powder, and high density filler.

The tip after rough sanding to shape. I want the leading edge radius to be consistent as it goes around the corner, which is why I put the squeeze on it earlier. Otherwise it ends up looking like a club foot and too chunky.

I did my figuring on what I want the top to look like, laid out the shapes, and cut it out. I used a 4" grinder with a cutoff wheel outside the lines, and then cleaned it up with a template and a pattern bit in a router. The foam was hogged out a bit, trying to expose about 1/2" of laminate inside, and leave the rest of the foam in about the shape of a fillet, from the inside.

Three layers of carbon cloth at three different axis orientations, peel ply on both sides, absorber cloth and mylar on the outside (pulled off, sitting at the edges of the pic), and packing tape on the wood block for release. The wood block was shaped to be the opposite of the cutout in the prior pic above.

...and then glued the laminate into the cutout. The foam was wet out, and the recess slightly over filled with a no- sag mix of epoxy, graphite powder (for color), and high density filler.

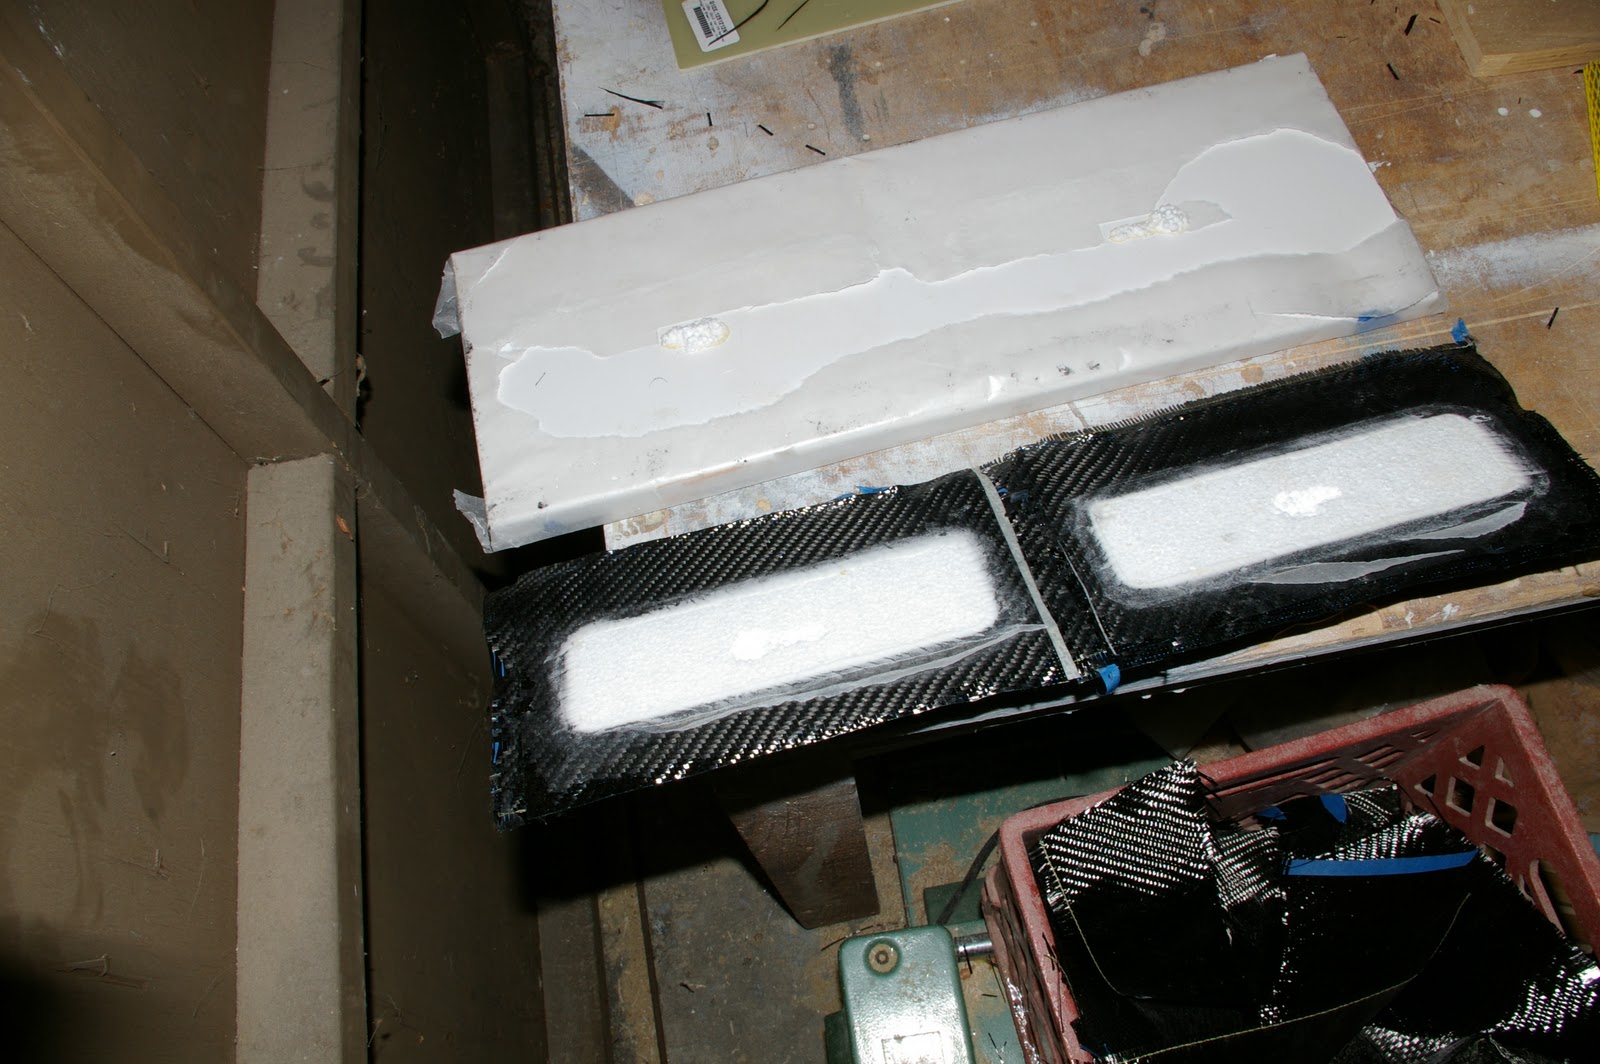
All trimmed neat, and all surfaces still have a clean peel ply texture, ready for the next steps.

This is pretty close to the finished profile. The trailing edge is still a bit ragged and a little long, and I'll wait to trim it to shape- the sacrificial extra material is nice to have for now.

Starting on the rudder gudgeons. I have a 3/8" SS rod for the pin, and I'm using it to align the several bronze bushings that will be embedded into the rudder. The transom gudgeon is just there to keep the right spacing between the lower two bushings.

Creating a sort of A-frame fillet enclosing the bushings and pin at the locations where the rudder straps will be wrapped. The epoxy filler is again wrapped in peel ply to shape it and eliminate (most of) the need for sanding.
I've since pulled the rod out (it didn't come willingly), cleaned up the filler some, and added the first layer of carbon uni strips over the top. Next will be some shaped foam blocks to fatten things a bit, and then wrap those with continuous hoops of uni, followed by a full sheet of cloth to tie everything together

And for something completely different-
I've been starting to build recesses for some blocks and cleats. Basically these are EPS foam blocks glued together until they're big enough, cut to the appropriate size and shape, their edges sanded to a reasonable radius, and then glued to a plastic-covered board. I cut a little window under the foam blocks so the glue would stick. The use quick, lightweight spackle to fill the pocks in the foam, and tool a radius at the bottom.

Here's the first set. I embedded a piece of G10 between the layers where the hardware will mount. The hardest part of building these is figuring out the folds and relief cuts and maintaining the fiber layout, especially once the cloth is wet out and stretchy and gooey.
Popped off the board, still have to dig out the foam and spackle, and then sand them. They turned out alright, might be able to leave them clearcoated, might have to paint, we'll see.

A deck beam to go between f53 and f18, made from strips cut off of my (former) fir rudder blank. It's been trimmed and installed, with some short little ply hanging knees under each end. Fun doing some wood stuff as a change from the constant glass work lately.
.... Which leads to what I was supposed to be working on for the last several weeks- glassing the frames to the hull sides. Nope, still haven't finished. I've done a couple, though- that work seems to require bigger continuous chunk of time than I've had available lately.


.jpg)


Wow Chad ! Your stuff is so high tech ! That post gave me lots of usefull ideas. Hope I ll put some in practice !
ReplyDelete