
This is the 2nd lay-up of the puck retainer. I turned the puck backwards in its hole, wrapped it and the bow in packing tape, and laid up carbon cloth and unis over it.

The mostly-finished part. It will get screw-fastened around the perimeter- I need to drill those holes and install some G10 discs inside for tapping into. This would be hell to do later, after the deck goes on.

Stem reinforcement. A layer of 6" wide kevlar tape under an 8" wide strip of bias-cut carbon.
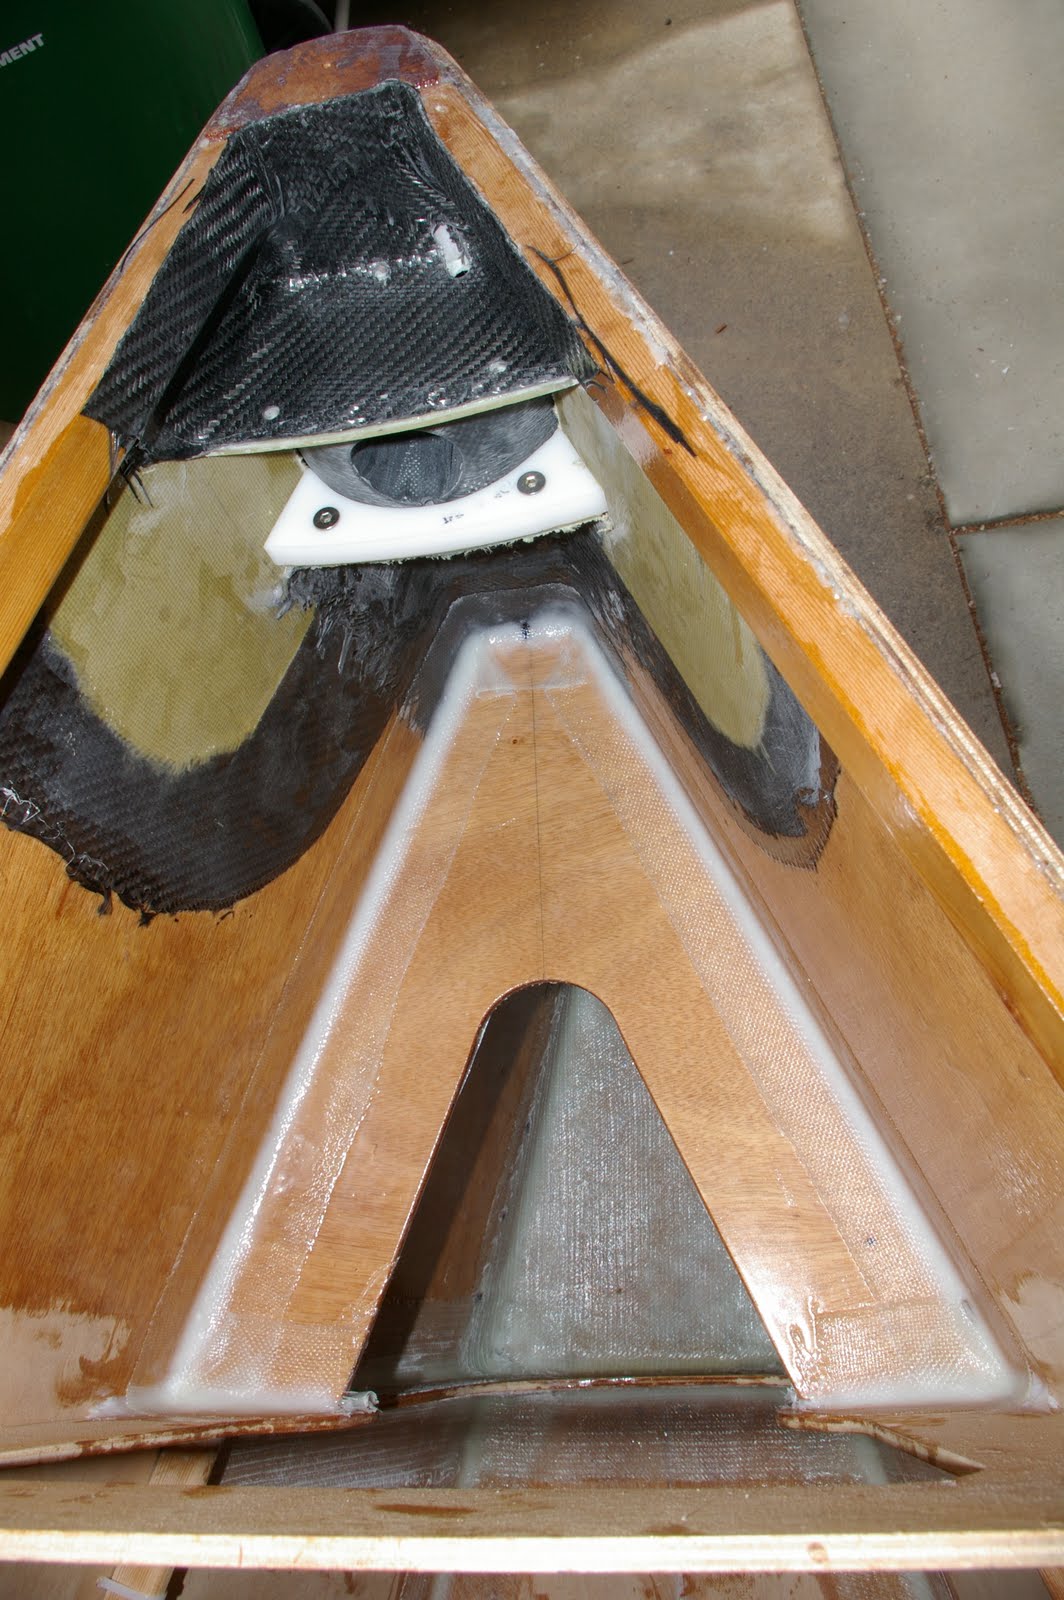
More bow reinforcing. I added a bow frame to tie the mid-stringers together, and a solid piece of 17oz. biax on the hull bottom panel to tie the centerline seam and distribute impact and trailer loads there. I've begun to fit the delrins behind the puck, and re-drilled the holes for the forestay- they enter the stem at the top-forward edge, and can be seen exiting the stem right at the inside corner between the stem and puck plate. The idea is that the port leg of the forestay will dead end here, while the starboard leg continues down through the puck to the knuckle of the bow, turns aft and is lead to a bunch of purchase along the forward sole of the boat between f18 and f53.

I'll explain how (I think!) the puck works:
The top two holes in the pic are just lightening holes. The oblong hole at the center is for the pole-out line- it will dead-end below the puck on the stem, pass through the puck plate and enter the puck, turning aft (well rounded and polished holes here) and exiting the puck at one of the two holes seen near the prod hole. The line wraps around the end of the prod and returns to the puck, in the other little hole by the prod, out the center of the puck, through the upper puck plate, to a block at the top of the stem and aft to be cleated. So the pole out is a net 2:1 purchase so far, and will allow the prod to go all the way into the puck so the puck can rotate further than the hull's entry angle. Good so far? Now the last hole, the "smile" in the pic. That's for the adjustable leg of the forestay, which passes through the puck and is lead down to the knuckle as described above. The smile-shaped cutout allows the puck to rotate without interfering with the forestay.
So I've spent quite a bit of time this last week doing little detail things like this, and it feels I have little to show for it. But this really needs to be done and fully sorted before the deck goes on, because access will never be as good as it is now. I also ran out of tape for the stringers and frame-to-side panel joints, so this stuff gave me something to do while that was shipping.


.jpg)


Well sh_t....looking at that I feel like Fred Flintstone building a car w/ my feet out the bottom for propulsion to race against Luke Skywalker's X wing fighter!!!
ReplyDeleteThat is simply SWEET!!!
Nice work. I hope like heck it comes out and functions as well as it looks like it can!
Really impressive!
Ben
Thanks, Ben.
ReplyDelete"Functions well" is something I'm still working on. It takes a bit of fiddling to get this stuff sorted, and I suspect a bit more fiddling once sailing loads are involved. We'll see.
-Chad
is all your canting going to happen inside the bow?? looks a really neat way to do it and get good cant inside. dont forget about where the water that gets in through the hole (and it will) is going to go! make sure it can drain away to somewhere!
ReplyDeletejust read the last part (DUH). what haapens to all your beautiful work up the front at the puck when you loose the pole to leeward under chute? we have lost ours well over 90 degrees sometimes. i can see something being munched up or snapping when that happens!! just a thought. you can easily do an internal canting system which would be neat and you wouldn't have the problem of loosing the pole. from what i can gather your trying to do an internal pole system but have it cant like mine with the external pole braces???
ReplyDeleteHi Tokyo,
ReplyDeleteYep, the braces cease working once they hit the headstay, don't they. I'm working out some whisker stay arrangements to keep some angle on the braces, to the pole tip. Trying to keep it as simple as possible, too...
There's a couple other internal cant boats I've seen pics of lately- the K650 and the guys building that swiss T680 come to mind. That's certainly a reasonable fallback position if this all doesn't work out.
I wanted to put in a small motorcycle battery for the stuff that allows me to do (radio, lights), so I'm adding a baby bilge pump too, to handle the accumulation between sponging out. I gave up on this being a dry boat inside- lots of limber holes already as well.
-Chad