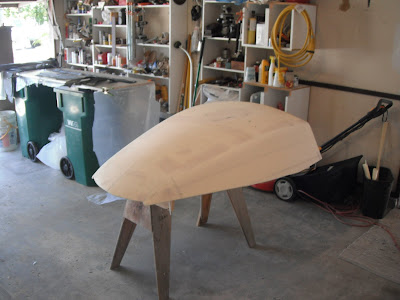
Trimmed the sides flush and fair with the top surface. Block plane is the go-to tool for most of the shaping, then tune things a little with a longboard.
Next, mark out two lines equal distance from the "chines" to define a uniform bevel.
Then mark down the center of the bevel, and roll the double chine into a radius, using a long block sander primarily, working in long diagonal strokes, and trying not to take out the center-of-curve reference line.
One batch of fairing filler to clean things up just a little, a little more sanding, and then all the cloth bits cut and the lamination table set up. With my house for sale, my shop is a bit neutered so that I can park two cars inside, so trash can benches is what I get.
Can't vacuum bag this shape, so peel ply weighted down with a bunch of clamps will have to do.
I used up lots of the excess carbon bits from a few past projects. That also meant I couldn't just drape some big sheets over the whole cabin and wet them out in one step. So there's a big layer of heavy triax on the top, some uni and biax running up the sides and overlapping the corner to beef that up, and some uni tapes across the mast step to act as the first half of a sort of BOD, for the Olson 30 fans out there. The 2nd half of the BOD will be underneath, with a thickened foam stringer and some more uni, creating the bottom half of a big, bent I-beam that will keep the side decks from having any tendency to flex inward under shroud tensions.
Edit to add:
Peel ply off.
Forgot to mention, I added a layer of 6 oz glass over the carbon to act as a buffer when fairing, and to add a little bit of thickness for better impact resistance. I was shooting for about 30 oz. of material for the outer skin, and about 50 for the corners. We'll see if it is enough- it "feels" solid so far.
Tinted, slightly thickened coat rolled on. I'll lightly sand this, maybe do one round of fairing, then flip and laminate the underside. I've got to think about the hatch design, and any hardware that gets mounted to the cabin, so I can carve out the foam and place compression material before the inner skin goes on as well.


.jpg)


No comments:
Post a Comment