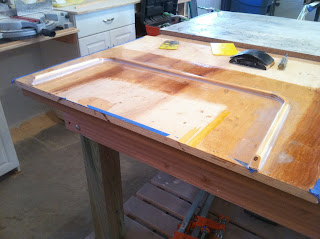
First, a pic before the morning's sanding session:
And then I spent two hours sanding it down. It's freezing outside, the shop heater is dialed back to around 50 degrees, and I'm still coated in sweat, which means I'm also coated in filler dust. Yay.
How much sweat dripping on the hull until it's considered "wetsanding"?
If I sand long enough, there will be enough dust on the floor so I can step down into the boat.
I want to glass the shear with some biax tape tomorrow, one (?!?) more round of fairing to blend that in, then glass the deck.
Then move into the cockpit. Not looking forward to sanding in the confined space, but at least most of that surface gets coated in non-skid, so I'll work on just getting things smooth, rather than truly fair.
I've built a nifty mold for my hatch support and rain channels, and started on the tooling for the boom parts. Nice to have interesting stuff, in between the enhanced interrogation sessions!
Edit to add pics of the hatch support mold and the shear biax:
The cabin top is curved, but I've made the mold flat. The finished part will be flexible enough to bend into position. The curved bits are cut from a donut of ply made from drilling two different sizes of hole saw. The middle straight piece is tapered toward the center, and the end pieces are fatter at the ends. The idea is to insure there are no low spots, and the water always drains out the ends. All the pieces have a 3 degree taper sanded into the edges so the layup can be released. The mold needs to be wet sanded, waxed several times, then I'll layup and vacuum some fabric over it and then glue the assembly to the underside of the cabin. I'm using a glass (and scrap carbon) solution because my hatch is a little smaller than most, and I want to reduce the opening as little as possible. I think I can make this a lot smaller and thinner and less obtrusive this way, than if I made it in wood.
Shear biax under peel ply. The peel ply helps to smooth and slightly consolidate the biax, so it needs a little less fairing filler to blend into the deck and hull sides. I backfilled against the tape with some filler this morning, so I'm one or two sanding sessions from glassing the deck.
I found this biax at Raka- it's their 12 oz by 6". I wished I'd found it earlier, instead of the 17 oz. stuff that everybody else carries. Apparently, they used to carry 6 oz. biax tape as well, which would have been perfect in my opinion.
Not worth a separate post, so here's another edit:
Hatch parts a-bagging.
Out of the bag...
... and rough trimmed.
I got a little bridging at the inner corners of the mold, even though I tried pretty hard to work the cloth in there. Probably a result of using stiff cloth (17 ox biax, mostly) I imagine. Oh well, some filler will make it alright.
My inside corner sander. A 2" pvc pipe union, split in half, and screwed from each side to a wood block. By dialing the screws in, I can flex the plastic until I get just the right radius to match the fillet. The two pipe segments also articulate just a bit, so the paper stays in better contact around the curves.
I have another round of filler on the deck, cured and ready for sanding.
Glass going on soon.


.jpg)


No comments:
Post a Comment